My sister Stephanie asked me many months ago to make her a strap for her new camera. I told her I could and then, well.....just now got around to it! I like to be organized. I like to sew. But new projects actually make me really nervous. I kept putting it off becuase I was worried that I'd make a disaster.
Finally, Stephanie politely gave me some material to use. I think this was her gentle way of asking "Hey, are you actually going to make it?" Then, my other sister, Jamie, asked if I could make her one also. The pressure was escalating. I picked out material for Jamie's strap, googled tutorials, decided I didn't like any of the camera strap covers, and just waited for ....well I just waited!
I decided on Sunday that I needed to get to work. I'd be seeing Stephanie this weekend and we're doing Jamie's birthday dinner soon. My procrastination had to end.
I started with Jamies' strap. I cut out two strips of the decorative fabric and one strip of fleece, to add softness to the strap. I sewed the three pieces together, inside out, to make a tube. Then when I tried to pull the tube through, it got stuck. I had made it too small! Totally destroyed the material! My nightmare came true. Well since the straps are for my sisters, I couldn't just give up. I actually needed to rethink my strategy and make it work.
I once again cut out two long strips of the patterned fabric. This time I made them wider, about4 inches. I also cut another strip of fleece, also wider, 4 inches. The length of the strips were 27 inches. I figured that I could always shorten them if needed.
First, I sewed the fleece onto the inside of one of the patterned strips. Then I sewed the two patterned strips, like sides facing one another, together. LEAVE the two short ends open, creating a tube!
Next, I worked the inside out tube, right side out. Sounds confusing doesn't it?! Just make sure that your pattern is now facing out, so it looks pretty!
 |
| Here's the failure. See how small and odd shaped it is?! |
I then ironed the tube flat. I made sure that the seems were as flat as possible, this will come in handy when you sew in a later step. By ironing, I was also able to obviously get the wrinkles out and straighten out the strap.
 |
| By ironing, it actually looks like a camera strap. Sort of! |
Now on a real camera strap, there are adjustable ribbons on the end. This allows the user to shorten or lengthen the strap. I obviously don't have the professional hardware to creat this. So, I improvised a little. I used a matching ribbon and cut it at 14 inches. I then folded it in half and tucked it into the open end of the tube. Do this on each end.
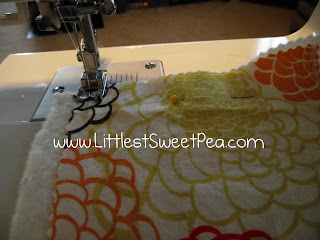
I pinned the ribbon and then sewed the opening, closed. I may have oversewed, but I wanted to ensure that the ribbon would not come out. This is where the camera is attached to the strap! So I wanted it to be super strong.
We're almost done! I bought a package of toggles at Walmart. A package of 2 toggles (think that's what they're called) only costs $1.50. I slid the toggles onto the ends of the ribbon. This will allow the user to adjust the length of the strap. I also heat sealed the ends of the ribbon (using a candle) to ensure that the ribbon wouldn't unravel.
You can undo the toggle and attach it to the hooks on the side of the camera. Then you reattach the toggle and adjust to your desired length. Tada! You're done.


I wish I had a need for a camera strap...someday I'll get a fancy camera :) You should join me for Handmade 52! http://raisingoranges.blogspot.com/2012/01/handmade-52-3.html
ReplyDeleteLove this, stop over and Link up At http://www.getouttamyheadplease.com/2012/01/show-it-off-link-party-8.html
ReplyDelete